


Dip the strip for one second, hold it level, wait 15 to 30 seconds, then read each pad against the color chart in natural light. That is the correct technique. Where most pool owners go wrong is not the dipping — it is sampling from the wrong spot, reading too early, storing strips in humid conditions, and then making chemical corrections without knowing which parameter to fix first. A strip that is read correctly and acted on in the right order keeps chemistry stable week to week. One that is misread, or corrected in the wrong sequence, creates a cycle of overcorrection that is harder to fix than the original imbalance.

How to Use Pool Test Strips Step by Step
The technique matters more than most people expect. Small deviations — a few extra seconds submerged, reading indoors under warm light, sampling near a return jet — produce readings that are consistently off in the same direction and lead to unnecessary chemical additions.
Collect your water sample from elbow depth, around 18 inches below the surface, and at least 12 inches away from any return jet or skimmer. Water near jets has just been filtered and re-enters the pool with a different chemistry profile than the main body of water. Sampling there gives a falsely favorable reading, particularly for chlorine.
Submerge the strip for exactly one second with the pads facing down. Remove it and hold it perfectly level — do not shake or flick the strip. Shaking washes reagent off the pads. Hold it still for the time specified on your product label, typically 15 to 30 seconds depending on the brand, before comparing to the chart.
Read in natural outdoor light, not direct sunlight and not indoors under incandescent or warm LED lighting. Both shift color perception enough to cause consistent misreads, particularly on the pH and alkalinity pads where adjacent color blocks are very close in shade. Work through each pad one at a time in sequence, matching one color before moving to the next. Trying to read all six simultaneously increases the error rate significantly.
When a pad falls between two color blocks, treat it as the lower of the two values for safety-critical parameters like chlorine, and retest after any correction rather than assuming the reading was at the favorable end of the range.

How to Read Your Test Strip Results
A standard 6-in-1 or 7-in-1 strip tests free chlorine, pH, total alkalinity, cyanuric acid, calcium hardness, and total hardness. Each pad tells you something different, and the readings interact — which is why it matters to understand what each number means for your specific pool before reaching for any chemical.
Free Chlorine
Target range: 1 to 3 ppm. Free chlorine is the active sanitizer available to kill bacteria and break down organic matter. Below 1 ppm, the pool is unprotected. Above 5 ppm, it becomes irritating to eyes and skin and starts degrading swimwear and equipment. If your strip also has a total chlorine pad, subtract the free chlorine reading from the total chlorine reading: the difference is combined chlorine (chloramines), the used-up form that causes the harsh chemical smell. Combined chlorine above 0.5 ppm is a signal to shock, not to add more standard chlorine.
pH
Target range: 7.4 to 7.6. pH is the parameter that affects everything else. Below 7.2, the water is corrosive — it etches plaster, degrades liners faster, and corrodes fittings, all while making chlorine burn off more rapidly. Above 7.8, chlorine loses a significant portion of its sanitizing effectiveness even when the free chlorine reading looks correct. Most pools drift upward naturally from aeration and CO2 loss, so a high pH reading is more common than a low one in well-circulated pools.
Total Alkalinity
Target range: 80 to 120 ppm. Alkalinity is the buffer that keeps pH from swinging in response to rain, chemical additions, or bather load. Low alkalinity makes pH unstable and difficult to correct — small additions of acid or base produce outsized swings. High alkalinity pushes pH upward and makes it resistant to downward correction. Always adjust alkalinity before adjusting pH; getting the buffer right first makes pH correction predictable and reduces the number of retests needed.
Cyanuric Acid
Target range: 30 to 50 ppm for outdoor pools. Cyanuric acid (CYA) protects chlorine from UV degradation, which is necessary in sunlit pools. The problem is that it only leaves the pool through dilution — splash-out, backwashing, or partial draining. Pools that rely primarily on stabilized chlorine tablets (trichlor) accumulate CYA over the season. Above 80 ppm, CYA starts binding with available chlorine in a way that reduces its effectiveness even when the free chlorine reading appears normal. The only fix is a partial drain and refill; there is no chemical that lowers CYA in a pool.
Calcium Hardness
Target range: 200 to 400 ppm. Low calcium hardness makes the water chemically aggressive — it draws minerals from the pool shell itself, which pits and etches plaster over time and affects fiberglass gel coats. High calcium hardness causes calcium carbonate to precipitate onto surfaces, fittings, and filter media, producing the white scale that shows up first at the waterline. Reducing calcium hardness requires dilution; there is no practical chemical reduction method at pool volume. Raising it is straightforward with calcium chloride added gradually.
Total Hardness
Target range: 150 to 400 ppm. Total hardness measures combined calcium and magnesium. In most residential pools it tracks closely with calcium hardness. A reading significantly higher than calcium hardness alone indicates elevated magnesium, which is less problematic for pool surfaces than calcium but still contributes to scale formation at high concentrations. If total hardness is high but calcium hardness is within range, the priority is managing calcium hardness and pH rather than pursuing further dilution.
How to Act on Your Test Results: The Right Correction Sequence
The order in which you make corrections matters as much as the corrections themselves. Adjusting pH before alkalinity is in range produces unpredictable results because the buffer that moderates pH changes is not yet established. Following the correct sequence prevents overcorrection and reduces the number of retests and additional chemical additions needed.
Fix total alkalinity first. If it is low, raise it with sodium bicarbonate added with the pump running. If it is high, bring it down carefully with muriatic acid in small doses, retesting between additions. Do not try to correct it in a single large dose.
Correct pH next. With alkalinity in range, pH adjustments respond proportionally. Use sodium carbonate to raise pH and muriatic acid or sodium bisulfate to lower it. Aim for 7.5, the middle of the target range, rather than the edges — this gives the water room to drift before your next test without going out of range.
Address cyanuric acid if it reads above 80 ppm before fine-tuning chlorine. High CYA changes how much free chlorine is actually available for sanitation, so correcting chlorine in a pool with excessive CYA is wasted effort until the CYA level comes down through dilution.
Adjust free chlorine last. With pH corrected, chlorine works at its rated efficiency and holds in the water more predictably. If the pool needs shocking, do it after pH is in range — chlorine-based shock in high-pH water loses effectiveness before it has a chance to work.
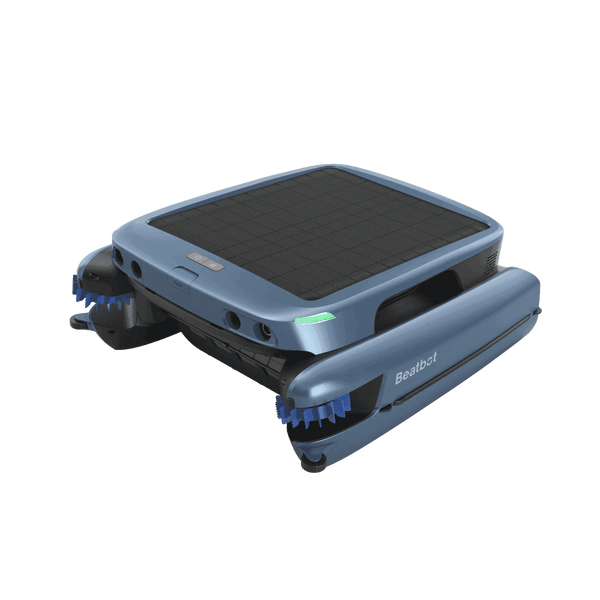
After any chemical addition, run the pump for at least an hour before retesting. Chemical additions need full circulation through the pool volume before a test reading reflects the true state of the water. Testing too soon after addition gives a localized result near the point of entry, not a representative sample. Pools with good circulation distribute corrections faster — the Beatbot Sora 30 robotic pool cleaner moves through the floor, walls, and waterline during a cleaning cycle, helping distribute freshly added chemicals into zones where return jet coverage is weakest, which shortens the effective wait time before an accurate retest.

Common Test Strip Mistakes and How to Avoid Them
Most inaccurate strip results come from technique errors, not defective strips. Knowing the specific mistakes and what reading they produce makes it easier to recognize when a result looks wrong before acting on it.
Submerging the strip too long
More than one second saturates the reagent pads and pushes readings toward the higher end of each scale. The most common result is an artificially high chlorine reading that causes you to skip a dosing cycle the pool actually needs. One second is firm — use a timer if needed until it becomes instinctive.
Shaking the strip after removal
Flicking or shaking the strip washes reagent off the pads and produces readings that skew low. The correct action after removing the strip is nothing: hold it level and wait. If water is running off the strip, you removed it too slowly or angled it downward on exit.
Reading in the wrong light
Indoor lighting and direct sunlight both distort color perception. Incandescent and warm LED light make orange and yellow tones appear more neutral, which causes pH and alkalinity pads to read lower than they are. Direct sunlight washes out subtle color differences between adjacent blocks. Read in open shade or indirect natural light for the most accurate color matching.
Sampling from the wrong location
Testing water collected near a return jet, at the surface, or directly from the skimmer basket gives an unrepresentative sample. Return jet water has just been filtered and has a different chemistry profile than the rest of the pool. Skimmer water is concentrated with whatever the surface has collected. The correct collection point is elbow depth, at least 12 inches from any jet or fitting.
Storing strips incorrectly
Strips must be kept in a sealed container away from moisture, heat, and direct sunlight. A container left open poolside, or stored in a humid pool house or garage, degrades within weeks. If your readings seem consistently off despite correct technique, check the expiration date and compare against a fresh strip or a professional water panel before making any corrections.
Testing at the wrong time of day
Free chlorine is consumed by UV radiation throughout the day and by bather activity. Testing at midday after heavy swim use gives a lower chlorine reading than the same pool tested at dawn. Test at a consistent time — ideally early morning before significant UV exposure — so your readings from week to week are comparable and trends are meaningful.
Keep strips sealed and away from heat and humidity. Degraded reagents are a common and overlooked cause of consistently wrong readings.

How Often Should You Test Pool Water?
For a residential pool in regular use, twice a week is the practical minimum. Weekly testing leaves too large a gap during high-use periods: a weekend of heavy bather activity, a rainstorm, or a heat wave can shift pH and chlorine enough to allow algae growth before the next scheduled test.
Test more frequently in specific situations. After heavy rain, which dilutes alkalinity and calcium hardness and can shift pH depending on local rainfall chemistry. After any chemical addition, to confirm the correction landed in range. After an algae outbreak and treatment, test daily until the water is fully stable. Before and after a pool party, check chlorine the morning before and the morning after.
Test strips work well for routine monitoring between seasons. They are not a substitute for a full professional water panel at a pool store once a month during the swim season. Lab testing provides more precise readings for cyanuric acid and calcium hardness in particular, giving you a reliable baseline that makes the strip readings between visits easier to interpret correctly.
FAQs
How long should a pool test strip stay in the water?
Exactly one second. Submerge it with pads facing down, remove it after one second, and hold it level without shaking. Wait the time shown on your product label — usually 15 to 30 seconds — before reading. Leaving the strip in longer saturates the pads and skews results high.
Why does my pool test fine but still look cloudy?
Cloudy water with correct strip readings usually points to one of three things: pH at the high end of range (7.8 or above), which causes calcium to precipitate and cloud the water; a clogged or undersized filter that is not removing fine particles; or cyanuric acid above 80 ppm, which reduces chlorine effectiveness even when free chlorine reads correctly. Check all three before adding a clarifier.
Can you test pool water right after adding chemicals?
Not reliably. Chemical additions need at least one hour of pump circulation before the pool water is mixed evenly enough for an accurate reading. Testing sooner gives a localized result near the addition point that does not reflect the full pool chemistry.
Are test strips accurate enough to rely on, or do you need a liquid test kit?
For pH and free chlorine, strips are accurate enough for routine monitoring when used correctly. For cyanuric acid and calcium hardness, a liquid DPD test kit or a professional water panel gives more reliable results. The most practical approach is strips twice a week for ongoing monitoring and a professional panel once a month during the swim season.
What does it mean if the chlorine pad shows no color change at all?
A blank or white chlorine pad usually means one of two things: chlorine is at zero and the pool is fully unprotected, or chlorine is so high it has bleached the reagent pad, a condition called chlorine washout. If the pool smells strongly of chlorine, the cause is almost certainly washout from an extremely high reading. Do not add more chlorine. Run the pump and let levels drop, then retest with a fresh strip.