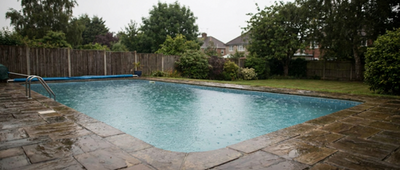


Installing an above ground pool involves six main stages: preparing a perfectly level site, laying a protective base, assembling the frame, setting the liner, filling with water, and connecting the pump and filter. A typical round or oval kit takes two to three people six to ten hours, plus another 12 to 24 hours of fill time. The single most important factor is a level base, because even a one-inch slope can cause the pool walls to lean, stress the liner, or collapse once filled.
Prepare Your Tools, Site, and Permits
Before you open the pool kit, gather your tools, confirm the site, and check local rules. Missing any of the three at the start is the usual reason an install stalls overnight.
Tools and materials
At minimum, you need a long spirit level (4 ft or longer), a tape measure, string and stakes for marking out the footprint, a shovel, a garden rake, a screwdriver, and an adjustable wrench. For the base, plan on a tarp or foam underlayment, plus enough fine sand or a commercial pool pad to cover the footprint to about two inches deep. For frame pools with vertical uprights, one 12x12 inch concrete patio block per leg.
Site and setback check
Choose a spot that gets full sun and sits at least 10 feet from overhead power lines, tree roots, septic lines, and sprinkler heads. Keep the pool at least 10 feet from the house itself in most US jurisdictions, and farther if required by your setback code, so water splash does not soak the foundation and so access stays clear on all sides for maintenance.
Permits and utility locate
Check your local building department before you dig, because many US cities require a permit for above ground pools over 24 inches deep and may require fencing or a self-closing gate. Call 811 a few days ahead for a free utility locate so you do not strike a buried line while clearing the ground.

Level the Ground
Level the ground by digging down high spots to match the lowest point of the pool footprint, never by filling low spots with loose sand. The finished surface must be level within one inch across the full diameter, and one half inch is better.
Mark and clear the area
Drive a stake at your planned center point and tie a string to it that matches the pool radius plus about one extra foot. Walk the string to scribe a circle, then cut and remove all grass, roots, rocks, and anything larger than a pea inside the line.
Check level across the full footprint
Set a long, straight 2x4 on edge with a spirit level on top, and rotate it like the hand of a clock around the center stake. Every position should read level. Shave down any high spot with a flat shovel and re-check, working around the full circle until all readings match.

Lay the Base
A proper base protects the liner from rocks and roots and smooths out minor imperfections. The order is ground cloth or foam first, then a thin, evenly raked layer of fine sand or a dedicated pool pad on top.
Ground cloth, foam, or sand
A woven ground cloth stops weeds and blocks most puncture points but does little to soften the floor. Interlocking foam tiles feel better underfoot and add a thin insulating layer, which helps the water warm up faster in spring. Fine masonry sand raked to about two inches deep works on any shape and is the easiest to smooth perfectly.
Patio blocks under the legs
Seat each vertical leg on a 12x12 inch concrete patio block buried flush with the base. Level the top surface of every block to the same plane before assembling the frame.

Assemble the Frame and Liner
Assemble the bottom track first, then the vertical legs, then drape the liner before you touch the top rails or uprights. The liner has to hang freely inside the finished bottom track before the top rails lock everything into place. Unroll the liner in the sun for at least an hour beforehand so it relaxes and stretches cleanly.
Bottom track and uprights
Lay out the bottom track sections loosely in a circle or oval, then connect them with the supplied T-joints or plates. Before locking anything down, measure across the diameter from several angles until every reading matches. Only then seat each vertical leg into its T-joint and tighten the hardware.
Liner placement and wrinkle removal
Center the liner inside the bottom track and drape the top edge over the wall, clipped in place temporarily with clothespins or the coping strips supplied with your kit. Smooth the floor of the liner outward from the center with your feet, in socks, until every wrinkle is pushed to the wall. A shop vacuum run between the liner and the pool wall sucks the liner tight against the sides for a crease-free fit.

Install the Pump, Filter, and Skimmer
The pump and filter assemble off to one side of the pool on their own level pad, and the skimmer and return fittings cut into the pool wall only after the water reaches the marked fill line.
Plumbing layout
Set the pump and filter on a flat, dry surface within hose reach of the skimmer and return. Keep the hose runs as short and as straight as possible, and support any long section so it does not sag and trap air. A cartridge filter is the easiest to maintain for first-time owners, while a sand filter handles heavy seasonal debris better in yards with many trees.
Priming and first start
Before you flip the switch, fill the pump basket with water through the lid to prime it, then close the lid finger-tight. Once primed, start the pump and watch for steady return flow and no bubbles in the pump lid within the first two or three minutes.

Fill the Pool and Balance the Water
Start the water slowly with a garden hose resting on the floor of the liner, and smooth wrinkles outward as the water rises. Once there are about two inches of water across the bottom, the liner can no longer be repositioned, so any remaining floor wrinkles need to go before that point.
Water chemistry at first fill
Test the water once the pool is filled, because tap water in many US regions sits outside the ideal pool range straight from the hose. Target a pH of 7.2 to 7.6, total alkalinity of 80 to 120 ppm, and free chlorine of 1 to 3 ppm. Calcium hardness should land between 200 and 400 ppm, with the lower end better for vinyl liners to reduce scaling.
A first-fill starter kit typically means chlorine shock (calcium hypochlorite or dichlor) to hit the chlorine target, sodium bicarbonate to raise alkalinity, muriatic acid or sodium bisulfate to drop pH, and a stabilizer (cyanuric acid) for outdoor pools exposed to direct sun.
Ladder, cover, and final checks
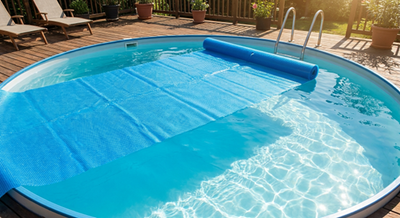
Install the A-frame or deck-style ladder according to the included instructions and verify it sits stable on both sides. Fit a solar or safety cover over the pool whenever it is not in use, both to reduce evaporation and to keep leaves out of the filter. Walk the perimeter one last time to check for leaks around the skimmer, return fittings, and hose connections.
Installation Tips to Avoid Common Mistakes
Most above ground pool problems do not show up on install day. They show up after the first winter, once settled fill compresses unevenly and pulls the frame out of round. The five tips below prevent the failures most installers regret later, and each takes minutes to get right during prep.
Dig down to level, never fill up
Sand and soil added to low spots compress differently than the undisturbed ground around them. Within a season, that uneven settling creates the exact slope you were trying to remove, and the frame ring goes out of round. Always shave high spots down to meet the lowest point instead.
Commit to one base layer, not a stack of thin ones
A half inch of sand over gravel over ground cloth settles at different rates across the footprint and ends up less level than a single, properly chosen base. Pick sand, foam, or a dedicated pool pad, and install it at full recommended thickness in one layer.
Set a patio block under every vertical leg
Without a block, each leg sinks a small amount every season, and uneven sinking is what puts the top rail out of round and wrinkles the liner. One 12x12 inch concrete block per leg, leveled flush with the base, is the single biggest longevity upgrade on a frame pool.
Cut wall fittings only after the water line is set
Installing the skimmer and return cutouts before the liner has fully settled under water weight leaves small gaps at the gaskets. Those gaps are nearly impossible to fix once the pool is full, because re-seating the gasket means draining the water below the fitting.
Never run the pump dry
Running a pool pump without water in the basket, even for a minute, can burn out the shaft seal and the motor windings. Always prime the pump by filling the basket through the lid before first start, and re-prime any time the basket has been open for cleaning.
Keep Your Above Ground Pool Clean
Once the pool is full and running, the weekly routine becomes vacuum the floor, brush the walls, skim the surface, and test the chemistry. Manual vacuuming works at the start, but most owners switch to a cordless robotic pool cleaner within the first season, because the floor of an above ground pool collects fine dirt faster than expected.
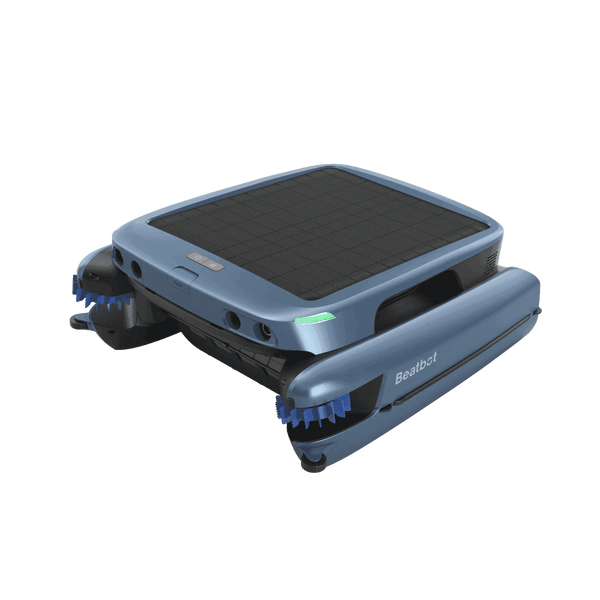
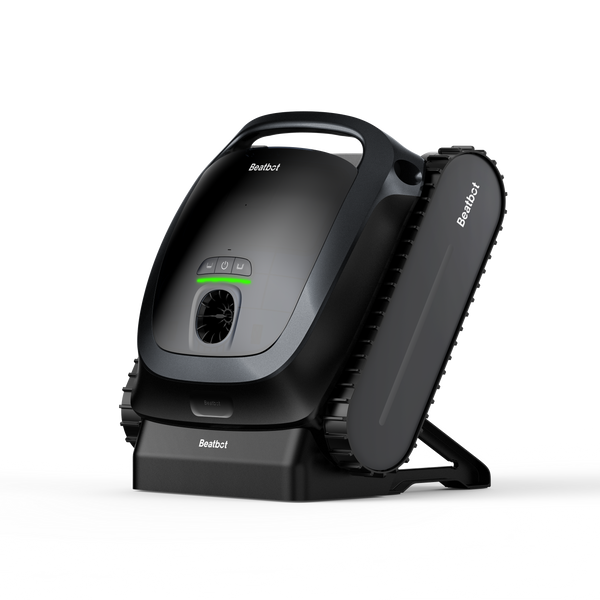
Shallow-water reach is the first thing to check, because many above ground pools run under three feet deep and most robots refuse to start below 12 inches of water. The Beatbot Sora 30 robotic pool cleaner is rated to operate in water as shallow as 8 inches and actively climbs onto platforms at least 3.3 ft by 3.3 ft, reaching entry steps and shallow ends that larger robots skip.
A 6,800 GPH water flow and 10,000 mAh battery cover a typical 24 ft round or 15x30 oval in one 5-hour run.
Surface debris is the second problem unique to above ground pools, because kit-level skimmers are small and slow to pull in pollen, bugs, and yard-blown leaves. The Beatbot Sora 70 robotic pool cleaner adds water-surface cleaning on top of floor, walls, and waterline, using a floating mode that drives across the surface and vacuums floating debris into a 6L basket through a 6.7-inch intake wide enough to swallow whole leaves.
Up to 7 hours of continuous surface cleaning per charge covers a full morning of oak or pine drop without any daily skimming.
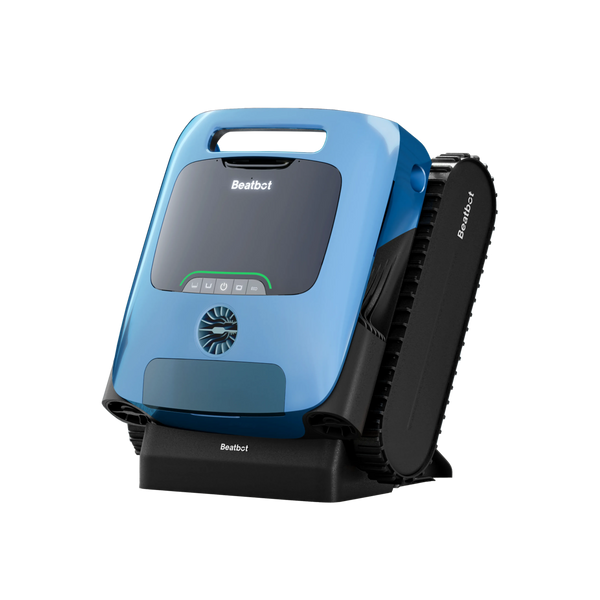
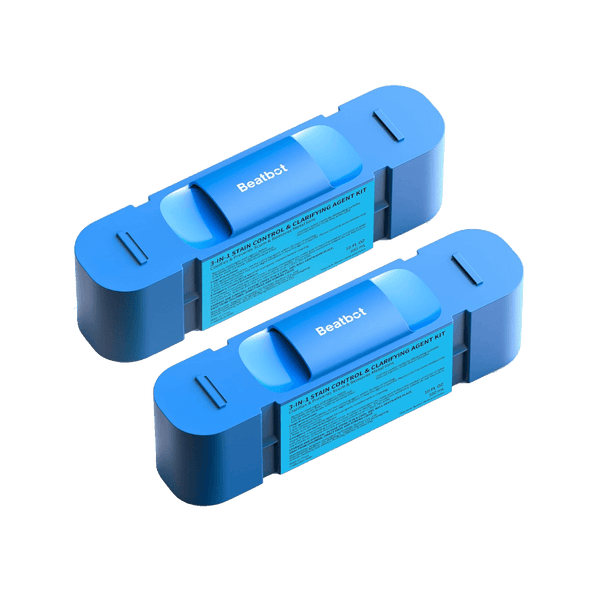
Water clarity is the third problem that creeps in as the season wears on, because above ground pool filtration runs lighter than an in-ground pump. The Beatbot AquaSense 2 Ultra robotic pool cleaner ships with Beatbot's ClearWater Clarification System, which holds a 300 ml chitosan clarifier kit derived from recycled crab shells inside an onboard clarifying box and releases it evenly while the robot cleans.
The clarifier binds oils, fine particles, and metal residues into larger clumps the robot or your pool filter can capture. One kit treats up to 99,000 gallons and lasts about a month at weekly use.

FAQs
How much does it cost to install an above ground pool in the US?
A basic 18 to 24 ft round metal-frame kit runs about $1,500 to $4,000 for the pool itself, with another $300 to $800 for base materials, patio blocks, a permit, and basic chemicals. Hiring a pro for leveling and assembly adds roughly $1,000 to $3,000 depending on site difficulty, so a fully installed DIY build often lands near $2,500 and a fully installed pro build near $5,000 to $8,000.
Can I install an above ground pool on grass?
No, not directly. Grass will die, rot, and create an uneven, spongy surface under the liner within weeks. Strip the grass and roots down to bare soil, level the area, then add a proper base of sand, foam, or a dedicated pool pad.
How many years will an above ground pool last?
A steel-wall above ground pool typically lasts 10 to 15 years, and a resin-wall model often runs 15 to 20 years, with the liner itself needing replacement every 6 to 10 years. Level base, consistent water chemistry, and a winter cover are the three factors that most separate a pool that hits the high end from one that fails early.
Can I set up an above ground pool by myself?
One person can handle the site prep and base work, but the frame assembly and liner install really need two people, and three is easier. The liner especially has to be held and smoothed from multiple points at once.