


A round above-ground pool installation depends on three things: a level base, a square wall track, and a liner that sits without wrinkles. Get those right and the rest is mechanical. Get any of them wrong and the pool will show it for years through bulging walls, off-balance water, or seam leaks. The 17 steps below follow the order experienced installers use, and each one flags the points where most first-time builds go off track.

What to Know Before You Start
Read your manufacturer's manual first. Brand-specific torque specs, bolt orientations, and panel sequences vary, and deviations void the warranty.
Plan two people for the wall and three for the liner. Never install in wind above ~5 mph; a single gust on a partially unrolled wall can bend the steel beyond repair or injure someone. Place every safety sticker from the yellow warning envelope on the wall before water goes in. Above ground pools are not built for diving or jumping at any depth.
Record the order number, model, size, purchase date, and liner pattern from the carton labels. All five fields are required for any future warranty claim.
What You'll Need
-
Shovel, rake, stiff broom
-
50 ft tape measure
-
4 ft carpenter's level (or builder's transit for 24 ft and larger)
-
Phillips screwdriver, 5/16" wrench, 1/4" wrench
-
Box cutter and duct tape
-
Stakes, rebar, hand tamp
-
12" x 12" x 1" patio blocks, one per upright
-
Mason sand for a 2 inch base across the full footprint plus the cove
Use mason sand only. Concrete sand, fill sand, and play sand all fail under a liner: they either pack with sharp edges that cut vinyl or compact unevenly under load. Mason sand quantity scales with pool size:
-
15 ft round: ~1.0 cubic yard (about 25 fifty-pound bags)
-
18 ft round: ~1.5 cubic yards (about 36 bags)
-
21 ft round: ~2.0 cubic yards (about 50 bags)
-
24 ft round: ~2.5 cubic yards (about 65 bags)
-
27 ft round: ~3.0 cubic yards (about 80 bags)
-
30 ft round: ~3.5 cubic yards (about 95 bags)
Add roughly 10% extra for the cove around the perimeter.
Step 1: Choose the Pool Location
Local code sets the minimum distance between the pool wall and your property line, septic field, well head, and overhead power lines. Call the county permit office before measuring; setbacks vary widely, and a pool too close to a property line has to come down.
Inside the legal envelope, mark the full pool footprint plus one foot of working radius using stakes and string. The high and low points across the footprint must be within 1 to 2 inches before you start digging. Anything greater needs grading or a retaining wall on the low side.
Avoid placing the pool over septic lines, irrigation runs, large tree roots, or fill that has been in place less than a year.
Step 2: Check Your Inventory
Open every box and check every part against the packing list before assembly begins. Replacement claims are far easier to file before the wall is up.
Check the wall sheet for shipping creases or kinks. A creased wall must be replaced; it cannot be installed safely. Count the uprights, top and bottom plates, top ledge rails, top cover connectors, stabilizer rails, and all hardware bags. Keep the liner sealed in its box and out of direct sun until Step 11. Cold vinyl tears, hot vinyl gets brittle.
Step 3: Prepare the Pool Site
Strip the marked area down to undisturbed soil, removing all sod, roots, rocks, and organic material at least 2 inches below the original grade. Anything organic left underneath will decompose and create a soft spot under the liner.
Cut high to low only. Find the lowest point in the footprint and dig everything else down to match. Loose fill always compacts under water weight, so backfilling low spots is the single most common cause of an out-of-level pool by year two.
Run a 2x4 with a level taped to it across the area in multiple directions, pivoting from a center stake. The site is ready when the level reads true within 1/4 inch across the entire footprint. Builder's transits are more reliable than carpenter's levels on pools 24 ft and larger.
Tamp the soil firmly once the site is leveled.
A pool pad or commercial pool floor liner placed between the tamped soil and the sand base extends liner life. A foam underlayment kit cushions the floor and blocks any small rocks that work up through the soil over time. A heavy-duty tarp is not a substitute: tarps trap moisture and grow mold under the liner. Skip the underlay only if your soil is genuinely rock-free clay or sand.

Step 4: Assemble the Bottom Track
Lay out the bottom rails (curved channels) and bottom plates (also called base plates, base cuffs, or vertical end caps) in the order shown in your manual. Bottom rails are not interchangeable with the inner stabilizer bars, which are always metal with a male and female end.
Snap the rails into the plates and form the full circle. Measure the diameter at four cross-points; all four readings should be within 1/2 inch of each other. The rim is now in its final position. Confirm each plate is sitting flat before moving on.
Step 5: Set the Patio Blocks
Each bottom plate sits on a 12" x 12" x 1" patio block. The blocks distribute wall and water load into the soil so plates do not sink unevenly through the first year.
Lift each plate, dig a shallow recess, and set the block flush with the surrounding ground. Level it side to side along the rim and front to back from inside to outside. Only the top of the block should be visible.
Recheck the rim with your level once all blocks are placed. If a plate has shifted, lift it, adjust the block, and reset it before continuing.
Step 6: Pre-Assemble the Uprights
Identify the top of every upright before assembly. The top usually has either an extra hole in the middle or extra holes on each side for the decorator caps. An upside-down upright will not seat the top ledge rail or the decorator cap.
Lay the uprights out on the ground with the top ends pointing the same direction, then pre-attach the top plates per your manual. Some models also call for upright support brackets at this stage.
If a deck or fence will mount to the pool, the post holders or deck brackets must go on the uprights now. Adding them after the wall is up usually requires disassembly.
Step 7: Install the Pool Wall
Do not attempt this step in wind. A gust on a partially unrolled wall has injured installers and bent walls beyond repair.
The wall ships as a tightly rolled coil of steel or resin-coated steel. Up arrows or a printed label mark the top edge. Skimmer cutouts always sit on the upper portion of the wall, and an upside-down installation is not noticed until Step 14, by which point the entire wall has to come back down.
With at least two people, lift the coil into the bottom rim at the marked starting point. One person feeds the wall along the rim while the other walks it around the perimeter, seating the bottom edge into the bottom rail. Keep slight inward tension on the wall as you unroll.
The two ends meet at the wall joint. Hold them with duct tape until Step 8.

Step 8: Bolt the Wall Joint
The wall joint is the most stressed point on the entire pool and must be assembled exactly as your manual specifies.
Most pools use a vertical column of bolts through pre-drilled holes, with a steel cover strip on the outside. Insert each bolt from inside the pool outward so the head sits inside and the nut sits outside. A reversed bolt protrudes into the liner and punctures it within a season.
Hand-tighten the full column first, then torque in the order specified by your manual. Run a strip of the manufacturer's wall foam or duct tape over the bolt column on the inside to prevent the heads from wearing the liner.
Some Wilbar models, including Saltwater Ultimate kits, ship with a Stainless Steel Wall-Saver Panel containing the skimmer and return openings. Kits with this panel have two wall joints instead of one, both assembled with equal care.

Step 9: Stand the Uprights
Stand each upright in its slot at the bottom plate. It should drop in without forcing. If it does not seat, the bottom plate is misaligned or the upright is upside down.
Hand-tighten only at this stage. The uprights need to shift slightly so the top plates can align with the top ledge rails in Step 16.
Walk the perimeter once all uprights are placed. Each one should stand roughly plumb with the wall seated evenly between the top and bottom plates. Misalignments compound by Step 16, so correct anything obvious now.
Step 10: Build the Cove and Sand Base
Inside the pool, build the floor the liner will sit on: a 2-inch mason sand layer across the full floor, and a 4 to 6 inch cove around the inside perimeter of the wall.
Spread the sand evenly, rake it smooth, then drag a long 2x4 across it to true the surface. The floor must be flat, neither crowned nor dished. Tamp firmly.
The cove supports the liner where it transitions from floor to wall and prevents it from being pulled into a 90-degree corner under water pressure. Foam cove kits hold their shape better than packed sand and are worth the cost on most installs; packed sand can collapse if the liner is pulled hard.
Walk the entire floor barefoot once the cove is in. Anything you can feel through the sand, you will feel through the liner permanently.

Step 11: Install the Pool Liner
Open the liner only at install time, and only when the air temperature is at least 70°F. If the morning is cool, leave the box in the sun for an hour first.
Liners come in three types: overlap, beaded, and unibead (J-hook). Overlap liners drape over the top of the wall and are held by plastic coping strips. Beaded liners snap into a separate bead receiver track. Unibead liners can install either way depending on the model. The type is printed on the box; the install method changes at this step.

With three people, unfold the liner inside the pool with the floor seam centered, position it loosely, then attach it at the top of the wall per its type. For overlap liners, drape the excess evenly around the perimeter and secure it temporarily with the plastic coping at every upright. The liner needs slack to settle into the cove as water is added; do not pull it tight.
Step 12: Smooth the Liner
Smooth the liner from the center outward before any water goes in. Wrinkles trapped under water pressure cannot be removed later, and they wear into permanent creases that thin the vinyl.
Working barefoot or in clean socks, push wrinkles outward in straight lines: floor first, then cove, then wall. The vinyl should sit flat against the floor with no air bubbles and against the cove with no slack.
A shop vacuum can pull air from between the liner and the wall to seat the liner tight before water enters. Push a 2 to 3 inch hose under the coping strip near the skimmer, hold it in place with duct tape, and run it until the liner is visibly suctioned to the wall. Leave the vacuum running as you start filling.
Step 13: Install the Stabilizer Rails
Push the first stabilizer rail down over the top of the wall (or the coping, depending on model). Leave one end raised slightly so the next rail can interlock.
The tapered end of each rail slides about 1 inch into the untapered end of the next. Walk the perimeter and install each rail in sequence to form a continuous ring. Some models alternate two rail sizes; check your manual.
The stabilizer ring is what gives the wall its rigidity under load. Missing or out-of-order rails leave weak points where the wall can flex outward when the pool fills.
Step 14: Add Water and Cut Skimmer Openings
Start filling. Stop at roughly 1 inch of water across the floor for one final wrinkle pass; once water pressure builds, wrinkles lock in.
Resume filling. If any section of wall begins leaning outward as the water rises, stop and check the upright at that location.
At 4 to 6 inches below the marked skimmer position, cut the skimmer and return openings through the liner. Use the gasket or face plate as a template, hold it firmly against the liner from inside, and cut along its inside edge with a fresh razor. An oversized cut is permanent; an undersized cut can be trimmed.

Install the skimmer and return fittings per your manual with gaskets seated on both sides of the wall. Continue filling to the middle of the skimmer opening.
Step 15: Plumb and Tighten the Uprights
With the wall now under water load, recheck each upright with a 4-foot level held vertically. The bubble must center in both axes.
If an upright leans, loosen its bottom plate, correct the lean, and re-seat it. Leaning uprights make Step 16 impossible to align and put uneven stress on the wall.
Once every upright reads plumb, torque the upright bolts to the spec in your manual.
Step 16: Install the Top Ledge Rails
Top ledge rails sit on top of the uprights and form the visible deck around the pool. Resin rails require special screws with attached washers; standard metal screws will crack them.
Install every rail loosely first. Trying to fully tighten as you go almost always leaves the last rail unable to seat. Once all rails are in place, tighten to spec. The rails should sit flat against the top plates with no gaps.
Step 17: Install the Top Cover Connectors
Top cover connectors join two top ledge rails at each upright. They are one-piece or two-piece depending on the model. Snap or screw each one into place over the joint between two rails.
Walk the perimeter and check that every connector sits flush with no rail end exposed. A connector that will not seat almost always traces back to a top ledge rail not fully tightened in Step 16.
The pool is structurally complete. Continue filling to the manufacturer's water level (usually mid-skimmer), then prime the pump and start circulation.

Common Installation Mistakes to Avoid
The expensive mistakes are rarely the obvious ones. Most failed builds trace back to four prep-stage errors:
- Skipping the cove. The liner is pulled into a 90-degree corner under water pressure and tears along that line within months.
- Reversed wall-joint bolts. Bolt heads on the outside leave nuts inside the pool, where they puncture the liner within a season.
- Cutting the skimmer cold. Mark the cut on the liner, hold the gasket in place, and double-check the height before the razor touches vinyl.
- Tightening the top ledge rails as you go. The last rail will not fit. Loose-install all rails first, then torque.
Above-Ground Pool Maintenance Tips
The first 30 days carry most of the long-term risk: settling, chemical balancing, and equipment break-in all happen at once.
Wash chemical splash off the steel frame weekly with mild soap (no abrasives). Pool chemistry is corrosive to bare metal, and untreated splash spots become rust within a season. Touch up scratches immediately with anti-rust enamel.
Inspect the liner monthly for slow leaks, scratches, or punctures. A small puncture can be patched underwater with a liner repair kit if caught early. Standing water at the base of the wall is almost always a sign of a leak.
Picking the Right Cleaner for a New Liner
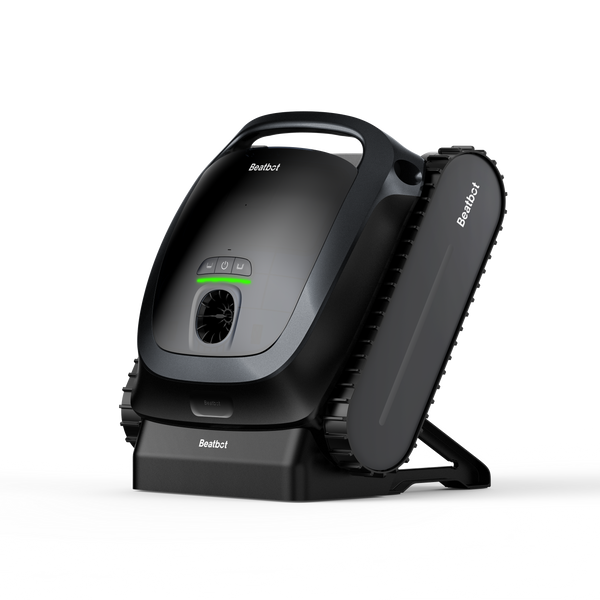
A new above-ground pool is the worst environment for old-style cleaning gear. Manual vacuums drag a hose across the new liner. Pressure-side and suction-side cleaners need a return-line connection that most above-ground setups do not have. A cordless robotic pool cleaner is the natural match: it sits in the pool unattended, covers the floor and walls in a single charge, and never trails a power cord across the new wall.
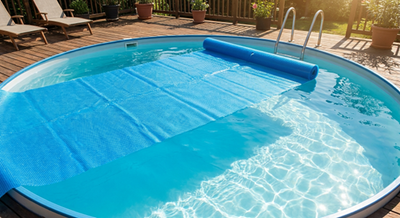
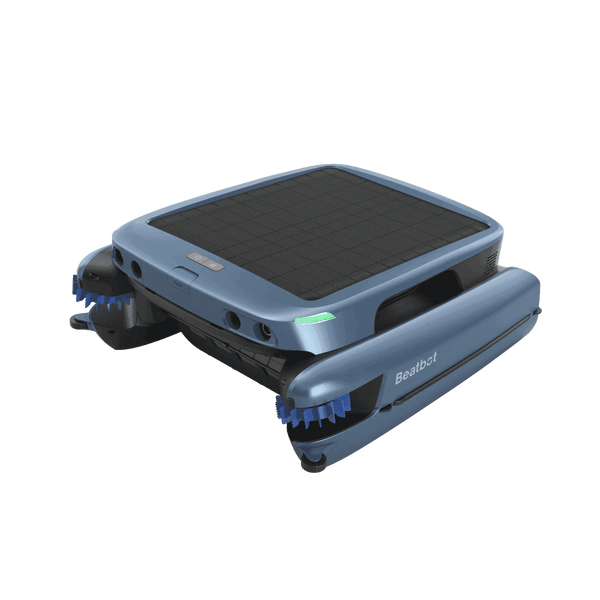
The Beatbot Sora 30 robotic pool cleaner is built for this category. It cleans floor, walls, and the waterline in one cycle, runs up to 5 hours on a single charge (4.5 hours on the floor-walls-waterline mode that most above-ground owners use), and works in water as shallow as 8 inches, which matters for the shallow ends and platform areas typical of above ground pools.
The 6800 GPH suction lifts the fine grit that wears liners over time, and the 5L filter basket holds enough debris that a standard 24 ft pool needs emptying once per cycle, not mid-run.
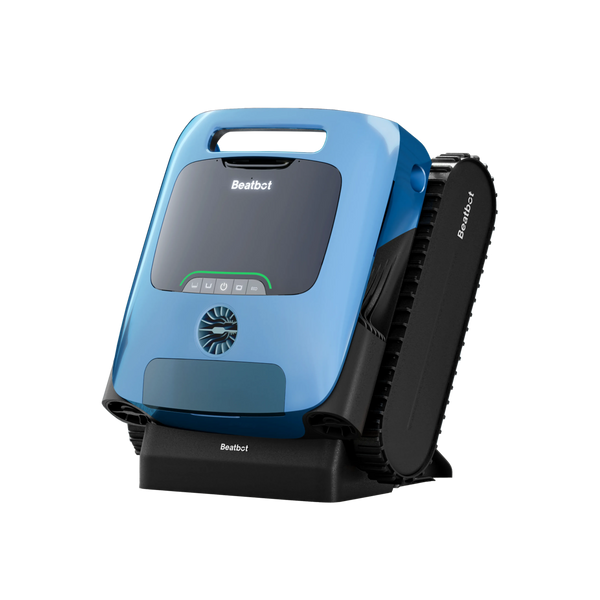
For pools under heavy tree cover, pollen, or pet load, the Beatbot Sora 70 cordless pool robot adds JetPulse water-surface cleaning, which uses jet streams to push floating debris toward the unit's intake before it sinks and stains the liner.
If you later upgrade to a larger or in ground pool, the Beatbot AquaSense 2 Ultra pool cleaning robot extends the same cordless logic to AI-mapped 5-in-1 coverage with HybridSense pool mapping for pools up to 3,875 sq ft.
Replace skimmer and return gaskets at the first sign of wear. A leaking gasket lets water trickle down the outside of the wall and rusts it from the bottom up, which is one of the few failure modes that voids most above-ground pool warranties.
Before winter closing, check every connection, confirm the liner is still seated, and look for rust on the frame. Damage from incorrect winterization is generally not covered by warranty.
FAQs
How long does it take to install an above-ground pool?
One to two days for an experienced two-person crew, two to three days for first-time installers. Site prep is the longest phase and often takes a full day on its own.
Do I need a permit to install an above-ground pool?
Most US jurisdictions require a permit for any pool deeper than 24 inches, and many require fencing, gates, or alarms regardless of depth. Permit rules are city or county level, so check with your local building department before ordering the pool.
Why shouldn't I put sand under the pool?
The advice you sometimes hear against sand refers to using sand alone on bare ground without a pool pad or floor liner. Loose sand can wash out at the cove and pit under the liner. The fix is the layered base in this guide: tamped soil, optional pool pad or foam underlayment, then a 2-inch mason sand layer with a foam cove. That setup outperforms sand-only and dirt-only floors on every measure.
What should I backfill around the outside of the pool with?
Backfill the outside perimeter with the same soil you removed during site prep, lightly compacted in 4 to 6 inch lifts. Slope the finished grade away from the wall so rainwater drains outward. Do not use loose sand or gravel against the wall; both wash out in heavy rain and undermine the patio blocks.
What chemicals should I add when first filling the pool?
Once the water reaches mid-skimmer, test for chlorine, pH, alkalinity, calcium hardness, and stabilizer (cyanuric acid). Adjust alkalinity first (target 80 to 120 ppm), then pH (7.4 to 7.6), then calcium hardness (200 to 400 ppm), then add stabilizer (30 to 50 ppm), and finally chlorinate to 1 to 3 ppm free chlorine. Run the pump continuously for the first 24 to 48 hours.
How much daily water loss is normal versus a leak?
Evaporation alone accounts for roughly 1/4 inch per day in summer, more in dry or windy conditions. Loss above 1/2 inch per day with the pump running, or any visible wet spot at the base of the wall, points to a leak at the skimmer gasket, return fitting, or liner. The bucket test (a marked bucket of pool water set on the top step for 24 hours) confirms whether loss is evaporation or a leak.
Do you have to wait 30 days to swim in a new pool?
The 30-day rule applies to plaster in ground pools, not vinyl-liner above ground pools. For an above-ground pool, run the pump and filter continuously for 24 to 48 hours and balance chlorine, pH, and alkalinity to manufacturer specs first. Vinyl liners also need 24 to 48 hours under water to fully relax into position.
Should I install the pool myself or hire a professional?
A round above-ground pool is one of the most owner-installable types, but the leveling and wall steps benefit from experience. Significant grading or an oval pool with a buttress system usually justifies a professional installer.