


To deep clean a sand filter: isolate it from the pool plumbing, remove the multiport valve, scoop off the top debris layer, insert a running garden hose deep into the sand bed and flush while stirring until the overflow runs clear, inspect the lateral assembly for cracks, then reassemble and run a full backwash and rinse cycle before returning to filter mode.
The process takes one to three hours depending on how long the filter has gone without a deep clean. Backwashing alone reverses surface flow but cannot reach compacted debris lower in the bed, biofilm on the laterals, or channels that let water bypass the filtration media entirely.

How to Deep Clean a Sand Filter Step by Step
The core of the process is straightforward: isolate the filter from the pool plumbing, open the tank, insert a garden hose into the sand bed, and flush with water until what overflows is clean. The steps around that process ensure the filter is protected, the laterals are not damaged, and the filter is correctly reassembled before restarting the pump.

Step 1: Isolate the filter from the pool plumbing
Before opening the filter, close the valves between the filter and the pool, or disconnect the plumbing lines. This is a non-negotiable first step.
The deep clean process involves flushing water into the open tank, and any connection to the pool at that point allows the loosened debris to travel down the standpipe and directly back into the pool. If the system does not have isolation valves, disconnect the plumbing at the filter fittings and cap or plug them.
Step 2: Set the multiport to the closed position and remove the valve
Turn the multiport handle to the closed position (or winter position, if closed is not available on your model) before removing any hardware. Once the valve is positioned correctly, loosen the band collar that secures the multiport to the filter body and carefully lift the multiport off the standpipe.
Set it aside where it will not be damaged. Inspect the o-ring at the base of the multiport for cracking or flattening. This is a good time to replace it if it shows wear, as it seals the connection between the multiport and the filter body.
Step 3: Remove the top layer of debris from the sand bed
With the filter open, the top of the sand bed is visible. There will typically be a layer of compacted debris, biofilm, and discolored material on the surface. Carefully scoop or vacuum this layer off the top of the sand before beginning the water flush. Removing it before flushing reduces the amount of material that needs to be suspended and overflowed out of the tank.
Step 4: Insert a garden hose into the sand bed and flush
Push a running garden hose several inches into the sand bed and allow the water to loosen the compacted material. Move the hose to different positions across the sand bed as flushing progresses.
The loosened debris will float to the surface and overflow out of the open filter tank. Stir the sand gently with a broom handle or similar tool to break up clumps and reach compacted areas, but work slowly and carefully around the center standpipe and lateral area.
Continue flushing until the water overflowing from the tank is clear. This can take 20 minutes to over an hour depending on how long the filter has been in service without a deep clean.
Step 5: Use a filter cleaner product if calcium or oil deposits are present
If the sand bed has significant calcium scaling, the grains will feel hard and clumped even after flushing with water alone. A diluted acid-based sand filter cleaner, available at pool supply stores, can be poured over the sand bed and allowed to soak for the time specified on the product label before flushing again.
Similarly, if the pool has had persistent oil or biofilm issues, an enzyme-based filter cleaner soaked into the bed before the water flush can help break down organic accumulation that water alone does not dissolve. These products are not needed for a routine annual deep clean but are appropriate when the sand feels or looks abnormally compacted or discolored after the initial water flush.
Step 6: Inspect the lateral assembly before reassembly
Before reinstalling the multiport, inspect the lateral fingers at the base of the standpipe. Each lateral is a slotted tube with openings slightly narrower than a grain of sand. The slots are easily damaged by tools, excess pressure, or rough handling, and a cracked lateral will allow sand to pass into the pool. Do not force anything against the laterals during the cleaning process.
If any lateral fingers are cracked or broken, replace the lateral assembly before reassembling the filter. Sand in the pool return lines or on the pool floor is often the first indication of a cracked lateral that went unnoticed.
Step 7: Reassemble, backwash, and rinse before returning to filter mode
Reinstall the multiport, tighten the band collar, and reconnect the plumbing. Before returning the filter to normal operation, run a backwash cycle to flush any remaining loose debris and reset the sand bed. Follow immediately with a rinse cycle to settle the sand before switching to filter mode.
Never skip the rinse after a backwash: water in rinse mode runs through the sand in the same direction as filter mode but exits to waste rather than returning to the pool, ensuring any remaining suspended debris does not enter the pool on the first pass after reassembly.

Why Backwashing Is Not Always Enough
Backwashing reverses water flow through the sand bed, which dislodges and flushes loose debris from the top layers but leaves compacted material deeper in the bed untouched. Three specific problems develop over time that backwashing cannot correct: channeling, base-level compaction, and biofilm buildup on the lateral assembly.
Channeling
Channeling occurs when water finds and repeatedly follows a low-resistance path through the sand bed rather than distributing evenly across its full depth. The channel can be caused by clumped or compacted sand, calcium deposits bonding grains together, or debris packed tightly enough to divert flow.
Once a channel forms, the water passing through the filter is taking a shortcut that bypasses most of the filtration media. The filter may show normal pressure but is providing a fraction of its rated filtration. Channeling is not visible from outside the filter and is not corrected by backwashing, because backwashing uses the same water paths the channeling has already established.
Compacted debris below the surface layer
Backwashing agitates and flushes the top portion of the sand bed. Fine organic debris that has worked its way deeper into the bed, particularly material below the midpoint of the sand column, is not reached by the reversed flow at backwash pressure. Over a full swim season, this material accumulates and compresses.
The result is a reduction in effective filtration depth: the filter is cleaning water through a shallow active layer above a compacted base, rather than through the full depth of the sand bed.
Biofilm and debris on the lateral assembly
The lateral assembly sits at the bottom of the filter tank, below the sand bed. The lateral fingers are slotted tubes that collect filtered water and pass it up through the standpipe to the multiport. Biofilm, fine sediment, and compacted debris accumulate on and around the laterals over time, reducing the flow rate at the collection point.
Backwashing flushes water down through the laterals, but it does not mechanically clean the exterior surfaces of the lateral fingers or the debris that settles below and around them.
Signs Your Sand Filter Needs a Deep Clean
Four patterns indicate that backwashing is no longer sufficient and a deep clean is needed: persistent high pressure after a fresh backwash, noticeably reduced return flow compared to earlier in the season, water that stays hazy despite correct chemistry and adequate chlorine, and a filter that needs backwashing more frequently than it used to.
Any one of these is enough to schedule a deep clean. If the filter has not been deep cleaned in more than a year of active use, do it at the start of the next season regardless of whether these symptoms are present.
Pressure remains elevated after backwashing
A clean, properly functioning sand filter operates at a baseline pressure, typically 8 to 15 psi depending on the system. Backwashing should return pressure close to that baseline. If pressure after a fresh backwash is 20 to 25 percent above the clean operating baseline and stays there through the next several days, the sand bed has compaction or channeling that the backwash did not resolve.
Flow rate has dropped noticeably
Reduced return jet pressure or visibly lower flow at the jets, compared to the beginning of the season or shortly after the last deep clean, indicates that the filter is not passing water efficiently. This can result from compaction in the sand bed, debris on the laterals, or a multiport valve issue. If the multiport valve positions and pump are confirmed functional, the sand bed is the most likely cause.
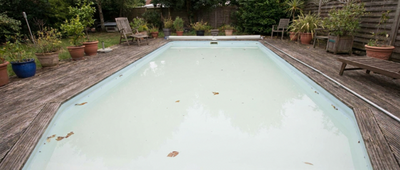
Water stays hazy with correct chemistry
A sand filter with channeling allows water to bypass most of the filtration media. The result is that fine particles pass through the filter and remain in the pool despite correct chemistry and adequate chlorine. If a pool consistently runs hazy with no chemistry explanation, and a clarifier provides only temporary improvement, the filter is not removing what it should be removing. This is the pattern most directly caused by channeling.
The filter needs backwashing more often than it used to
If backwash frequency has increased significantly without a corresponding increase in pool debris load, the sand bed is loading faster than it should. This is often a sign that the filtration depth has effectively shortened due to compaction, so the active filtration layer is becoming saturated more quickly than a full-depth sand bed would.
What to Do After the Deep Clean
After the filter is back in service, run the pump continuously for 24 hours and monitor pressure to establish the new baseline. Also use this window to clean the pool floor and walls, because the deep clean process, and any period of reduced filtration leading up to it, typically allows sediment and fine debris to accumulate on pool surfaces that normal filtration would have caught.
A filter that was channeling or compacted has been letting fine particles through for weeks or months. That material has settled on the pool floor, along the waterline, and in corners. Brushing and vacuuming immediately after restoring filter performance removes that accumulated load before it gets cycled back into the water column by swimmer activity.
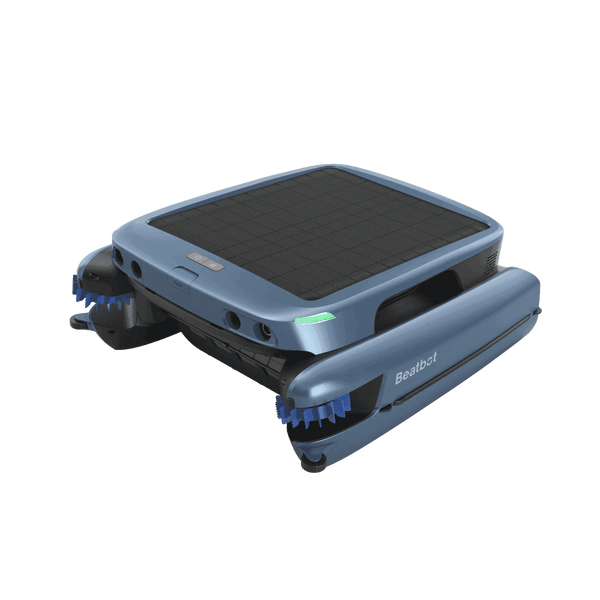
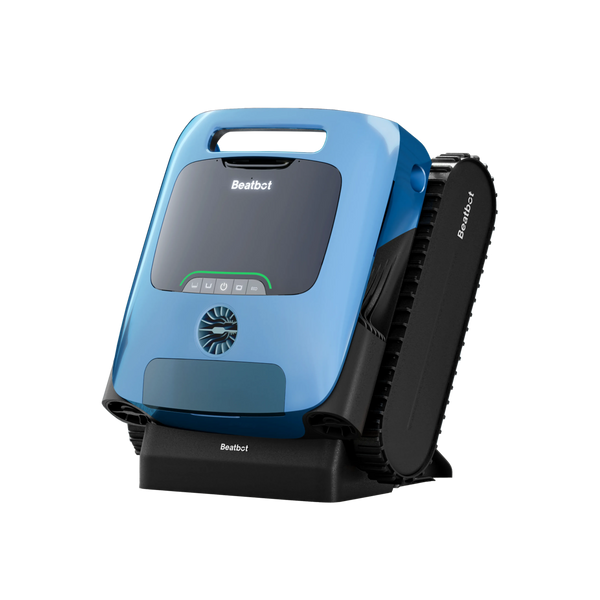
For pools with significant sediment accumulation after a period of degraded filtration, running a robotic pool cleaner immediately after the filter is restored to full performance is the most efficient way to clear the floor and walls in a single pass. The Beatbot Sora 70's 6,800 GPH suction with an optional 3-micron ultra-fine filter captures the fine sediment and dead organic matter that settled during the period of reduced filtration.
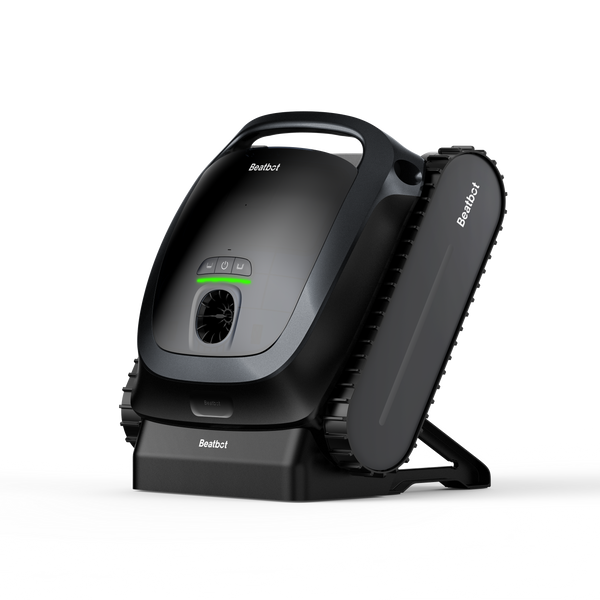
Its dual roller brushes dislodge material from the walls and waterline, and the S-shaped floor cleaning path ensures full coverage without missed patches. Running the Sora 70 immediately after filter restoration prevents the accumulated floor sediment from being resuspended into the water column during the next swim session and immediately loading the freshly cleaned filter.
Record the new baseline filter pressure after the deep clean and backwash. Write it down or note it in the pool maintenance app. Future backwash decisions should be based on this clean baseline, not on a general rule of thumb.
A filter that has been compacted for a long time will have had an artificially high baseline that normalized downward after deep cleaning, and comparing future pressure to the pre-clean baseline would cause unnecessary early backwashing.
When to Replace the Sand Instead of Deep Cleaning
Sand rarely needs replacement. Filter sand existed for millions of years before it entered your filter, and a few swim seasons of use do not meaningfully degrade its filtration capability. Deep cleaning recovers performance in almost all cases where backwashing has become insufficient. There are three specific situations where replacement is the better choice rather than another cleaning attempt.
The sand has calcified into hard clumps that do not break up with cleaning
If the sand bed has significant calcium hardite deposits bonding the grains into solid masses, and acid cleaning does not break them up, the effective surface area of the filtration media has been permanently reduced.
This level of calcification is uncommon but occurs in pools with chronically high calcium hardness combined with high pH over extended periods. Replacement is more cost-effective than repeated acid treatments that only partially dissolve the deposits.
The sand has been in service for more than ten years without replacement
Over many years of use, the edges of sand grains gradually smooth from repeated water passage. Sharp-edged grains trap particles more effectively than smooth ones, and sand that has been in service for a decade or more may have enough grain smoothing to reduce its filtration efficiency below what cleaning can restore.
Most pool professionals recommend replacing sand every 5 to 7 years as a precaution, though in practice many filters run effectively for longer without replacement if deep cleaned annually.
There is a suspected biological contamination of the sand bed
In rare cases, usually following a severe algae bloom that was left untreated for an extended period, the sand bed can develop a persistent biological contamination that chemical treatment alone does not clear.
If shocking the pool to correct chlorine levels consistently fails to clear the water, and deep cleaning the filter produces no improvement in filtration performance, replacing the sand is the appropriate next step. This situation is uncommon in pools that receive any routine maintenance.
FAQs
How often should I deep clean my sand filter?
Once a year, at the start of the swim season, is the standard recommendation for a pool in regular use. Pools in high-debris environments (surrounded by trees, heavy pollen areas, or with high bather loads) may benefit from a mid-season deep clean as well.
If backwash frequency has increased significantly or pressure is consistently elevated after backwashing, that is a signal to deep clean regardless of where you are in the season.
How long does a sand filter deep clean take?
The flushing step alone typically takes 20 minutes to over an hour depending on how long the filter has been in service without a deep clean.
Filters that have never been deep cleaned or have not been cleaned in multiple seasons often require 45 to 90 minutes of flushing before the overflow water runs clear. Budget two to three hours for the full process including disassembly, cleaning, reassembly, backwash, and rinse.
Can I damage the filter by deep cleaning it?
The main risk is damaging the lateral assembly. The lateral fingers are slotted tubes with very fine openings, and they crack easily if struck by tools or subjected to excess mechanical force.
Work slowly and carefully around the lateral area, never force tools against the laterals during sand stirring, and inspect each lateral before reassembly. Beyond the laterals, the o-ring at the base of the multiport should be inspected and replaced if it shows wear, as it seals the connection between the valve and the tank.
What is channeling in a sand filter and how do I know if I have it?
Channeling occurs when water finds a low-resistance path through the sand bed and follows it repeatedly rather than distributing evenly through the full depth of the media. The filter may show normal pressure but is only filtering a fraction of the water passing through it.
The clearest sign of channeling is persistent water haziness despite correct chemistry and adequate chlorine levels. Clarifier provides temporary improvement because it makes particles large enough to be caught even through a partial filter pass, but the haze returns quickly because the underlying filtration gap has not been resolved.
Do I need to replace the sand after a deep clean?
Almost never. Deep cleaning restores sand filtration performance in the vast majority of cases.
Sand replacement is warranted only if the sand has calcified into solid masses that do not break up with cleaning, if the sand is over ten years old and showing performance decline consistent with grain smoothing, or if there is a suspected persistent biological contamination that chemical treatment and deep cleaning together have not resolved.
Should I add a filter cleaner product or just use water?
Water alone is sufficient for a routine annual deep clean in most pools. A filter cleaner product is worth adding if the sand has visible calcium scaling (grains that feel hard and bonded together after flushing), if the pool has had persistent oil or biofilm problems, or if the flush water does not clear up after an extended flushing period despite thorough sand stirring.
Acid-based cleaners address calcium deposits; enzyme-based cleaners address organic accumulation. Do not use both at the same time.