


When a pool pump won't prime, the cause is almost always an air leak or a failed seal somewhere between the pool and the pump, not a motor problem. Air enters the suction line, the pump can't build enough pressure to pull water, and circulation stops.
Most priming failures come down to six specific causes, each with a clear fix. A worn lid O-ring is the most common by a wide margin, and replacing it costs a few dollars. The table below maps symptoms to causes if you want to start there, or read through the sections for a full diagnosis.
Quick Symptom Diagnosis
|
Symptom |
Most Likely Cause |
First Fix to Try |
|
Pump basket won't fill with water |
Worn lid O-ring or loose lid |
Inspect and replace lid O-ring; reseat lid |
|
Air bubbles blowing from return jets |
Air leak on the suction side |
Check unions, fittings, and drain plugs for air gaps |
|
Pump loses prime after shutting off |
Water level too low or check valve failure |
Top up pool to mid-skimmer; inspect check valve |
|
Pump surges and loses suction repeatedly |
Blocked impeller or partial air leak |
Clear impeller; tighten or replace suction-side fittings |
|
Pump primes but pressure drops quickly |
Clogged filter or partially blocked skimmer basket |
Clean or backwash filter; empty skimmer and pump baskets |

What Priming Actually Means
Priming is the process of removing air from the pump housing and suction lines so water can flow from the pool to the pump and through the filter without interruption. A pump that has primed correctly fills its basket completely with water, builds steady pressure, and runs quietly. One that hasn't primed pulls air instead of water, surges, and either fails to build pressure or loses it within seconds of starting.
Pool pumps are not self-priming in the way some other pump types are. They rely on a flooded suction: water must be present in the pump basket and lines before the impeller can move it. Any break in that water column, whether from a cracked fitting, a worn seal, or a low water level, lets air in and breaks the prime.
Cause 1: Worn or Cracked Pump Lid O-Ring
This is the most common cause of a pool pump that won't prime. The pump lid O-ring sits in a groove around the lid housing and creates an airtight seal when the lid is closed. Over time, O-rings flatten from compression, dry out from UV and chemical exposure, or develop small cracks that are not always visible to the naked eye. Any gap in that seal lets air enter the pump housing directly.
To check it, remove the pump lid after the pump has been off long enough to release pressure. Pull out the O-ring and run your fingers along the full circumference. Look for flattening, cracks, brittleness, or any deformation. If the O-ring has any of those signs, replace it. Before reinstalling, clean the lid groove and apply a thin coat of pool-safe silicone lubricant. Do not use petroleum jelly, which degrades rubber.
Replacing the lid O-ring is the first fix to try on any priming problem, even if the O-ring looks acceptable. A degraded O-ring that passes a visual check can still leak under operating pressure. If the pump primes after the O-ring replacement, the diagnosis is confirmed.
Cause 2: Loose or Cracked Pump Lid
Even a good O-ring cannot hold a seal if the lid is not fully seated or has developed a hairline crack. Clear polycarbonate lids are particularly prone to stress cracking, especially in climates with high UV exposure and temperature swings. A crack that is barely visible in still light may leak significantly under the negative pressure the pump creates while running.
Remove the lid and inspect it under direct light, flexing it gently to open any hairline cracks. Reseat the lid carefully and tighten it hand-tight plus a quarter turn. Overtightening can crack the lid or distort the O-ring groove. If the lid has any visible cracking, replace it rather than relying on thread sealants or tape.
Cause 3: Air Leaks in the Suction-Side Plumbing
Any fitting between the pool and the pump can introduce air. Unions, threaded adapters, valves, and glued PVC joints all develop small gaps over time. The tricky part is that these leaks usually do not drip water; they only pull air inward when the pump is running under negative pressure. That makes them hard to spot visually.
The most reliable way to find a suction-side air leak is to run the pump and watch the water in the pump basket. Steady bubbling that persists after 30 seconds of operation points to an ongoing air entry, not residual air being cleared.
Work backward from the pump toward the pool: check union O-rings first, then threaded fittings, then valve seals. Tighten unions hand-tight. Replace union O-rings if they are flattened or cracked. For threaded fittings, drain the line, remove the fitting, apply fresh PTFE thread sealant tape, and reinstall.
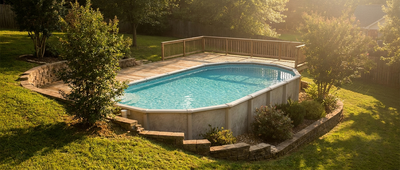
Cause 4: Low Pool Water Level
If the pool water level drops below the skimmer opening, the skimmer pulls air instead of water during part of its intake cycle. The pump receives intermittent air, loses prime, and cannot sustain consistent pressure. This is easy to overlook because the pool may look full from the deck while the actual water line relative to the skimmer is too low.
The correct level is mid-skimmer, meaning the waterline sits halfway up the skimmer opening. Below that, air enters regularly. Above it, the skimmer loses suction effectiveness. If your pool consistently drops below this level between fill-ups, check for a slow leak in the plumbing or shell rather than assuming it is only evaporation.
Cause 5: Blocked Skimmer Basket, Pump Basket, or Impeller
Restricted flow at any point in the suction line forces the pump to work harder to pull water, which can cause it to lose prime or fail to build full pressure. A full skimmer basket starves the pump. A full pump basket reduces the water volume available to the impeller. A blocked impeller, where debris has wrapped around the shaft or lodged between the vanes, stops water movement almost entirely.
Empty both baskets and inspect them for cracks that could let debris through to the impeller. To check the impeller, turn the pump off and use a thin tool or your finger to feel inside the impeller housing through the pump basket port. Clear any debris carefully. If the impeller is damaged or worn, it needs replacement rather than cleaning.
Cause 6: Drain Plugs or Housing Seals Leaking Air
After filter cleanings, winterization, or any service work that requires opening the pump housing, drain plugs and housing seals are common sources of air leaks. A drain plug that is slightly cross-threaded or missing its O-ring lets air enter the pump body at that point. Housing seal plates that are not fully secured or have worn gaskets behave similarly.
Inspect every drain plug on both the pump and filter after any service work. Remove each plug, check the O-ring or gasket, replace it if damaged, and reinstall straight and snug. Do not overtighten, which can crack plastic plugs. If the seal plate gasket on the pump housing looks compressed or cracked, replace it before running the pump again.

How to Prime a Pool Pump Manually
Once the air leak is identified and fixed, prime the pump with these steps. Turn the pump off completely. Remove the pump lid and set it aside. Fill the pump basket to the brim with water using a garden hose. Reinstall the lid, making sure it is fully seated before tightening.
Open all suction valves fully. Turn the pump on and watch the basket window. Within 30 to 90 seconds, the basket should fill with water and hold a steady flow. If it does not, there is another air entry point upstream. Repeat the inspection from the pump back toward the skimmer.
If the pump primes but then loses prime after shutting off and restarting, a check valve failure or a suction valve that does not fully close is likely allowing the water column to drain back toward the pool between cycles. A check valve installed on the suction line holds the water in place when the pump is off, preventing the need to re-prime each time.

When to Replace Parts vs. the Whole Pump
Most priming failures are fixed by replacing one or two inexpensive components. The lid O-ring, union O-rings, and drain plug O-rings together cover the majority of cases and cost very little. The pump lid itself is the next most common replacement, followed by the impeller if it has taken debris damage.
Replacing the full pump makes sense when the pump housing is cracked, the seal plate is warped beyond sealing, the motor has failed separately, or the pump is old enough that multiple components are degrading at the same time. If a pump repeatedly loses prime after O-ring and seal replacements, an inspection of the housing and seal plate for warping or cracks is the next step before committing to a full replacement.

Keeping Your Pool Clean While the Pump Is Down
When the pump is down, water circulation stops, but debris, wall buildup, and waterline residue do not. If the repair takes more than a short time, dirt settles on the floor, organic matter starts to collect, and the pool can become harder to recover once the pump is running again.
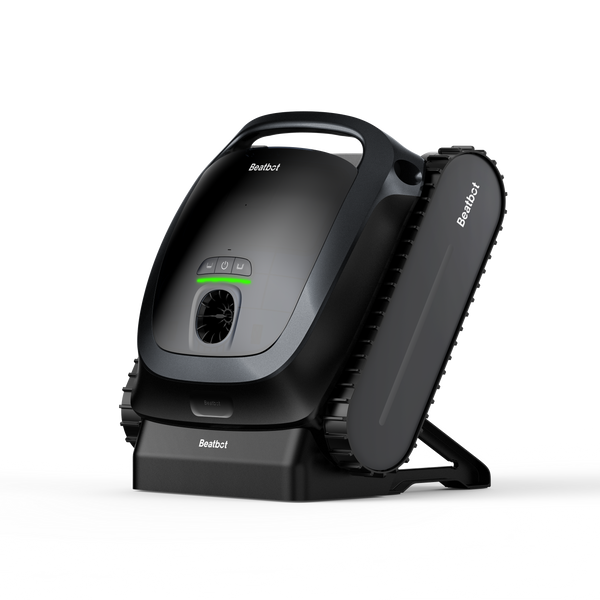
A cordless robotic pool cleaner helps on the physical side of maintenance during that downtime. Because it runs independently from the pump system, it can keep the floor, walls, and waterline cleaner even while filtration and circulation are offline. That does not replace the pump, but it does help keep the pool from getting worse while you fix the priming issue.
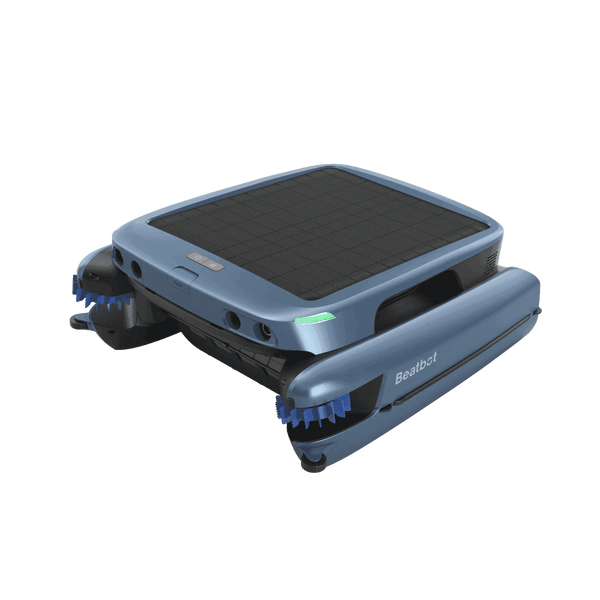
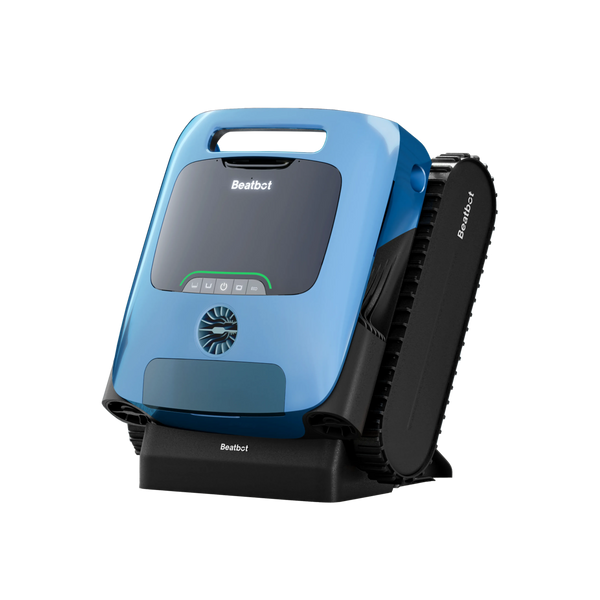
For broader full-pool cleaning coverage during a pump repair, the Beatbot AquaSense 2 Ultra is the better fit. If surface debris is also a concern while the pump is offline, the Beatbot Sora 70 is another strong option. Both work independently from the pool's pump system, so you can keep surfaces cleaner while you deal with the repair.
FAQs
Why won't my pool pump prime?
The most common reasons are a worn pump lid O-ring, an air leak in the suction-side plumbing, a low pool water level, or a blocked impeller. In most cases it is not a motor failure. Start by replacing the lid O-ring and inspecting the suction-side fittings for air leaks.
How do I know if my pump lid O-ring needs replacing?
Remove the lid after turning the pump off. Pull out the O-ring and run your fingers along it. If it feels flat, stiff, cracked, or has lost its round cross-section, replace it. Even an O-ring that looks acceptable visually can leak under operating pressure if it has been in service for several years.
How do I find an air leak on the suction side?
Run the pump and watch the pump basket window. Persistent air bubbles after 30 seconds of operation indicate an ongoing air entry rather than residual air clearing. Work from the pump back toward the pool: union O-rings first, then threaded adapter fittings, then the skimmer and valve connections. Tighten unions and replace any O-rings that are flattened or cracked.
What if the pump primes but loses prime every time I restart it?
The water column is draining back toward the pool when the pump is off. A failed check valve on the suction line or a suction valve that does not hold its position are the most common causes. Installing or replacing a check valve on the suction line keeps the water in place between cycles and eliminates the need to manually reprime after each shutdown.
Can I damage the pump by running it without prime?
Yes. Running a pool pump dry, without water flowing through the housing, generates heat from friction inside the pump. The mechanical seal, which sits between the motor shaft and the wet end, can fail quickly without water to cool and lubricate it. If the pump runs for more than a minute or two without priming, turn it off, identify the cause, and fix it before trying again.
When should I replace the pump instead of repairing it?
Replace the pump when the housing is cracked, the seal plate is warped, or multiple components are failing at the same time and repair costs approach the cost of a new pump. A single O-ring or lid replacement is always worth trying first. Most priming problems are resolved with inexpensive parts rather than a full pump replacement.