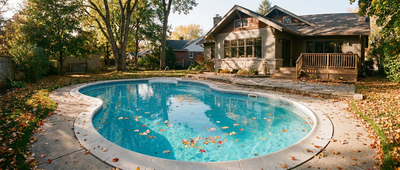


Cloudy pool water is a special kind of annoying, especially after you've already added chemicals and the water still looks flat and hazy.
The fix usually comes down to choosing the right tool. A pool clarifier and a pool flocculant tackle cloudiness in two different ways.
Below is a practical guide to picking the right one, using it correctly, and figuring out what's going on when the water refuses to clear.

Why Pool Water Gets Cloudy
Clarifier and flocculant can help, but they won't compensate for weak circulation, a struggling filter, or a pool that's still fighting algae.
Three things decide whether your pool clears up:
-
Circulation: Is the pump moving water well, and are you running it long enough each day? Low flow leaves fine debris suspended.
-
Filtration: Is the filter clean and functioning? A clogged cartridge, worn DE grid, or channeling sand filter won't catch fine particles effectively.
-
Chemistry: Cloudiness often comes from sanitizer not doing its job, especially when stabilizer is high, or from active algae. Clarifier and flocculant aren't algae killers.
If the pool is green, feels slick, or you keep losing clarity a day after treatment, handle the algae and organics first. Get the pool sanitized and brushed, then use clarifier or flocculant to remove what's left behind.

When to Use a Pool Clarifier
A clarifier is made for the tiny stuff. Think pollen, dust after a windy weekend, or the fine haze that sticks around after a busy swim week. It helps those particles stick together so your filter can trap them.
Clarifier is usually the right call when:
-
The pool is slightly to moderately cloudy and you can still see most of the floor.
-
The water is already sanitized and you're clearing leftover haze.
-
Your filter is in decent shape and you can run the pump consistently.
Clarifier isn't instant. Since the filter is doing the work, it may take several hours up to 48 hours to see solid improvement.
Where clarifier goes wrong:
-
Too much product. Overdosing can make water look worse and can bog down your filter.
-
A dirty filter from the start. If the filter is already loaded, clarifier has nowhere to put the gunk.
When to Use Pool Flocculant
Flocculant is for big cloudiness, when the water looks gray or white and you can't see the bottom. Instead of relying on the filter, floc binds particles together so they sink to the floor, where you can remove them directly.
Flocculant is usually worth considering when:
-
The pool is very cloudy and you want a quicker reset.
-
You're cleaning up after a major mess like storm debris, dust, or heavy post-treatment haze.
-
You can vacuum the settled layer carefully, ideally to waste.
Floc is more hands-on, because you'll usually be vacuuming a layer of sediment off the bottom. If you vacuum to waste, you'll lose water and may need to refill and rebalance afterward. And depending on your pool setup, floc can be hard to use well—especially if you can't remove debris without stirring it right back up.
Pool Clarifier vs Flocculant Quick Guide
If you're standing there staring at cloudy water and just want a clear answer, use this.
|
What you're dealing with |
Better choice |
Why it works |
|
Slight haze, pool is blue or gray, floor mostly visible |
Clarifier |
Helps your filter capture fine particles over time |
|
Heavy cloudiness, can't see the floor |
Flocculant |
Drops particles to the bottom so you can remove them directly |
|
You can run the pump continuously and your filter is healthy |
Clarifier |
Filtration keeps improving clarity as it runs |
|
You can vacuum slowly and you have a waste setting or line |
Flocculant |
Removes settled debris without clogging the filter |
|
You want the least hands-on cleanup |
Clarifier |
Less work than vacuuming a sediment layer |
If you're still unsure, bring circulation, filtration, and sanitizer back into a healthy range first. When those are off, clarifier and floc often get blamed for a problem they can't fix.
How to Use Pool Clarifier Correctly
Clarifier works best when you treat it like a short filtering session, not a shortcut.
-
Make sure the pool is sanitary. If you suspect algae, get that under control first. Brush walls and floor so fine debris is suspended and can reach the filter.
-
Start with a clean filter. For a cartridge filter, rinse thoroughly, and if it's been a while, do a deeper clean. For sand or DE, backwash if needed so you begin with good flow.
-
Dose for your pool size. Follow the label and dose based on pool volume. Don't round up—extra product doesn't speed things up.
-
Run the pump continuously. Keep circulation going so particles keep passing through the filter. Watch filter pressure, because clarifier can load it quickly.
-
Clean the filter again if progress slows. If the water improves and then stops improving, the filter may be full. Clean or backwash, then keep circulating.
If nothing changes after a full day of good filtration, stop adding product and move to troubleshooting.

How to Use Pool Flocculant Correctly
With floc, patience matters. The goal is to let debris settle undisturbed, then remove it without kicking it back up.
-
Don't use floc on a live algae problem. If the water is green or you're burning through sanitizer, handle that first. Floc works best on dead debris and suspended particles.
-
Add floc, then turn the pump off. Dose according to label directions and circulate briefly if instructed. Then shut the pump off so everything can settle.
-
Let the pool sit. Give it time to drop out into a visible layer on the floor. Turning the system back on too soon puts you right back where you started.
-
Vacuum slowly and carefully. Move the vacuum head slow and steady to avoid stirring the sediment. If your system allows it, vacuum to waste so you're removing debris instead of sending it through the filter.
-
Bring circulation back and clean up. Restore normal circulation after vacuuming. Clean or backwash the filter if any residue made it through.
Automatic cleaners usually aren't great for freshly flocced debris. Too much movement can stir up what you're trying to remove.

Why Pool Clarifier or Flocculant Didn't Work
When cloudiness won't budge, it's usually one of these issues.
You're still dealing with organics or algae
Even if the pool looks more blue than green, lingering organics can keep water dull. Get sanitation solid first, then clarify what's left.
Your filter can't keep up
Worn cartridges, channeling sand, or overloaded DE grids can keep fine particles circulating. If pressure rises fast, expect to clean the filter more often during the clearing process.
Circulation is too weak
Low flow means clarifier can't feed particles to the filter effectively, and floc may not distribute evenly. Check skimmer baskets, pump baskets, and return flow for obvious restrictions.
Chemistry is working against you
If sanitizer isn't effective for your stabilizer level, cloudiness can return quickly. If you're constantly chasing clarity, it's worth reviewing the basics and testing more carefully.
You picked the wrong product
Clarifier won't drop a heavy cloud overnight, and floc won't help much if you can't remove the sediment without re-suspending it.
Your setup makes floc a tough fit
If you can't vacuum to waste, or can't vacuum without stirring things up, floc gets a lot less practical. In those cases, clean filtration plus time is usually the better path.

Swim Safety and Equipment Notes
-
Swimming: Follow the product label for re-entry timing. When in doubt, wait until the water is clear, chemistry is balanced, and there's no visible residue.
-
Filter stress: Clarifier can load filters quickly. Plan on extra cleaning or backwashing while you're clearing the pool.
-
Water loss: Vacuuming floc to waste can drop the water level fast. Be ready to refill and rebalance.
-
Handling chemicals: Store products sealed, dry, and out of heat. Never mix pool chemicals in the same container.
How to Prevent Cloudy Pool Water

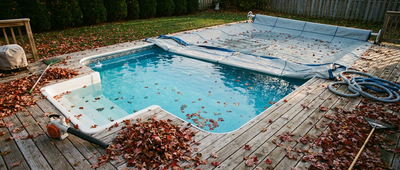
Most cloudy pool episodes start the same way. Debris builds up, circulation isn't great, or filtration gets behind.
A few habits make a big difference:
-
Run the pump long enough each day to keep water moving.
-
Brush and skim regularly, especially after storms or heavy swimmer days.
-
Clean the filter on a schedule instead of waiting for the pool to look bad.
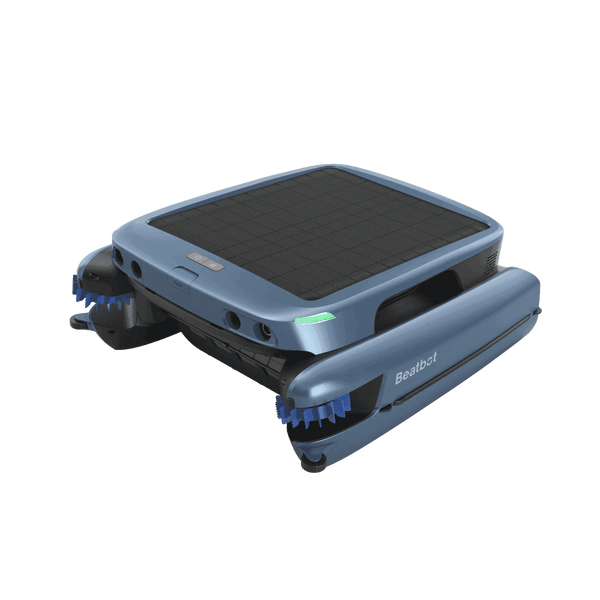
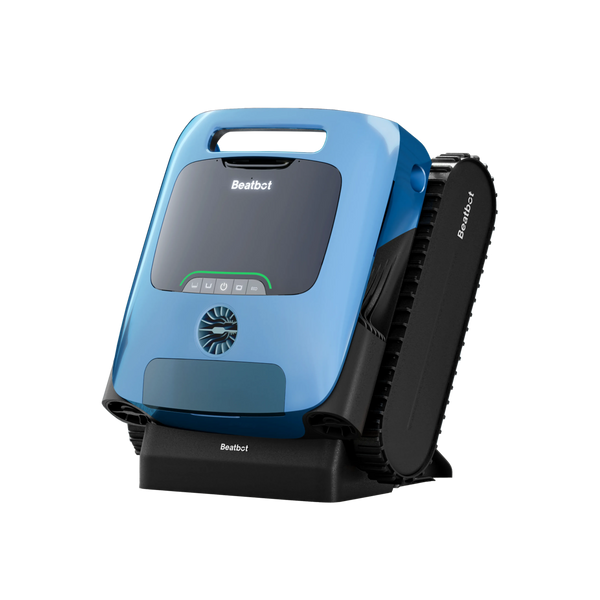
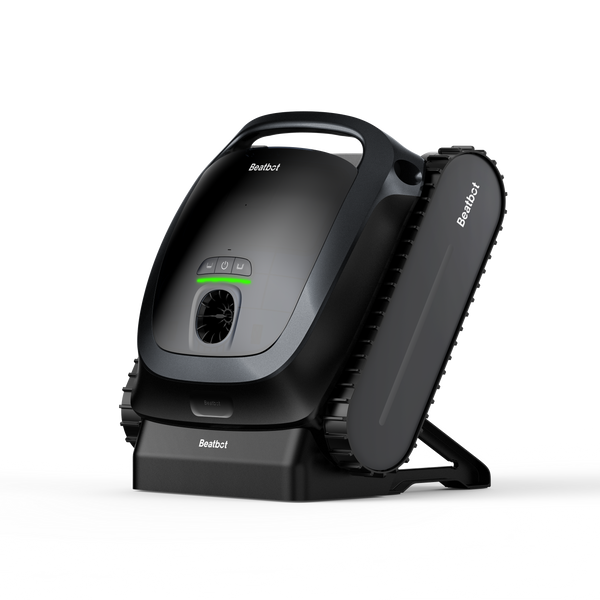
Routine mechanical cleaning also helps you stay ahead of haze by removing fine debris before it has time to hang in the water. If you want that kind of steady, low-effort upkeep, a robotic pool cleaner that scrubs the floor and walls and keeps the waterline from getting grimy can make a real difference from week to week.
Beatbot AquaSense Pro is built for broad coverage across the surface, floor, walls, and waterline, with multiple cleaning modes so you can match the run to what your pool needs that day. Its 9-motor system and up to 5,500 GPH suction help it pick up consistently, which keeps small debris from piling up into that cloudy look that tends to show up right when you want the pool looking its best.
FAQ
Can I Swim After Using a Pool Clarifier or Pool Flocculant?
Follow the label. If you're unsure, wait until the water is clear, chemistry is balanced, and there's no residue.
How Long Does Clarifier Take to Clear Cloudy Pool Water?
Typically several hours up to 48 hours, depending on your filter and how much fine debris is suspended.
Does Flocculant Work Faster Than Clarifier?
Often, yes. It works best when you let it settle fully and then vacuum it out without stirring the layer back into the water.
Can I Use Flocculant With a Cartridge Filter?
It's often not a great match. Floc is meant to be removed directly, ideally to waste, not forced through a cartridge.
Why Did My Pool Get Cloudy Again After Treatment?
Most of the time it's unresolved algae or organics, weak circulation, a dirty filter, or sanitizer that isn't effective for your stabilizer level.